Chapter 5 cheat sheet
Chapter 5 cheat sheet: Estimating the fundamental frequency
A shaft carrying several discs has as many natural frequencies as masses, and the lowest one sets the critical speed. Two quick methods bracket it without solving the full problem: Dunkerley from below, Rayleigh from above.
Start here
Find the influence coefficients first: aij is the deflection at i under a unit load at j (F5.1.4, F5.1.5), and aij=aji is a free check (F5.1.2). Both methods are built on them.
One picture
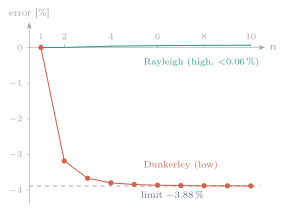
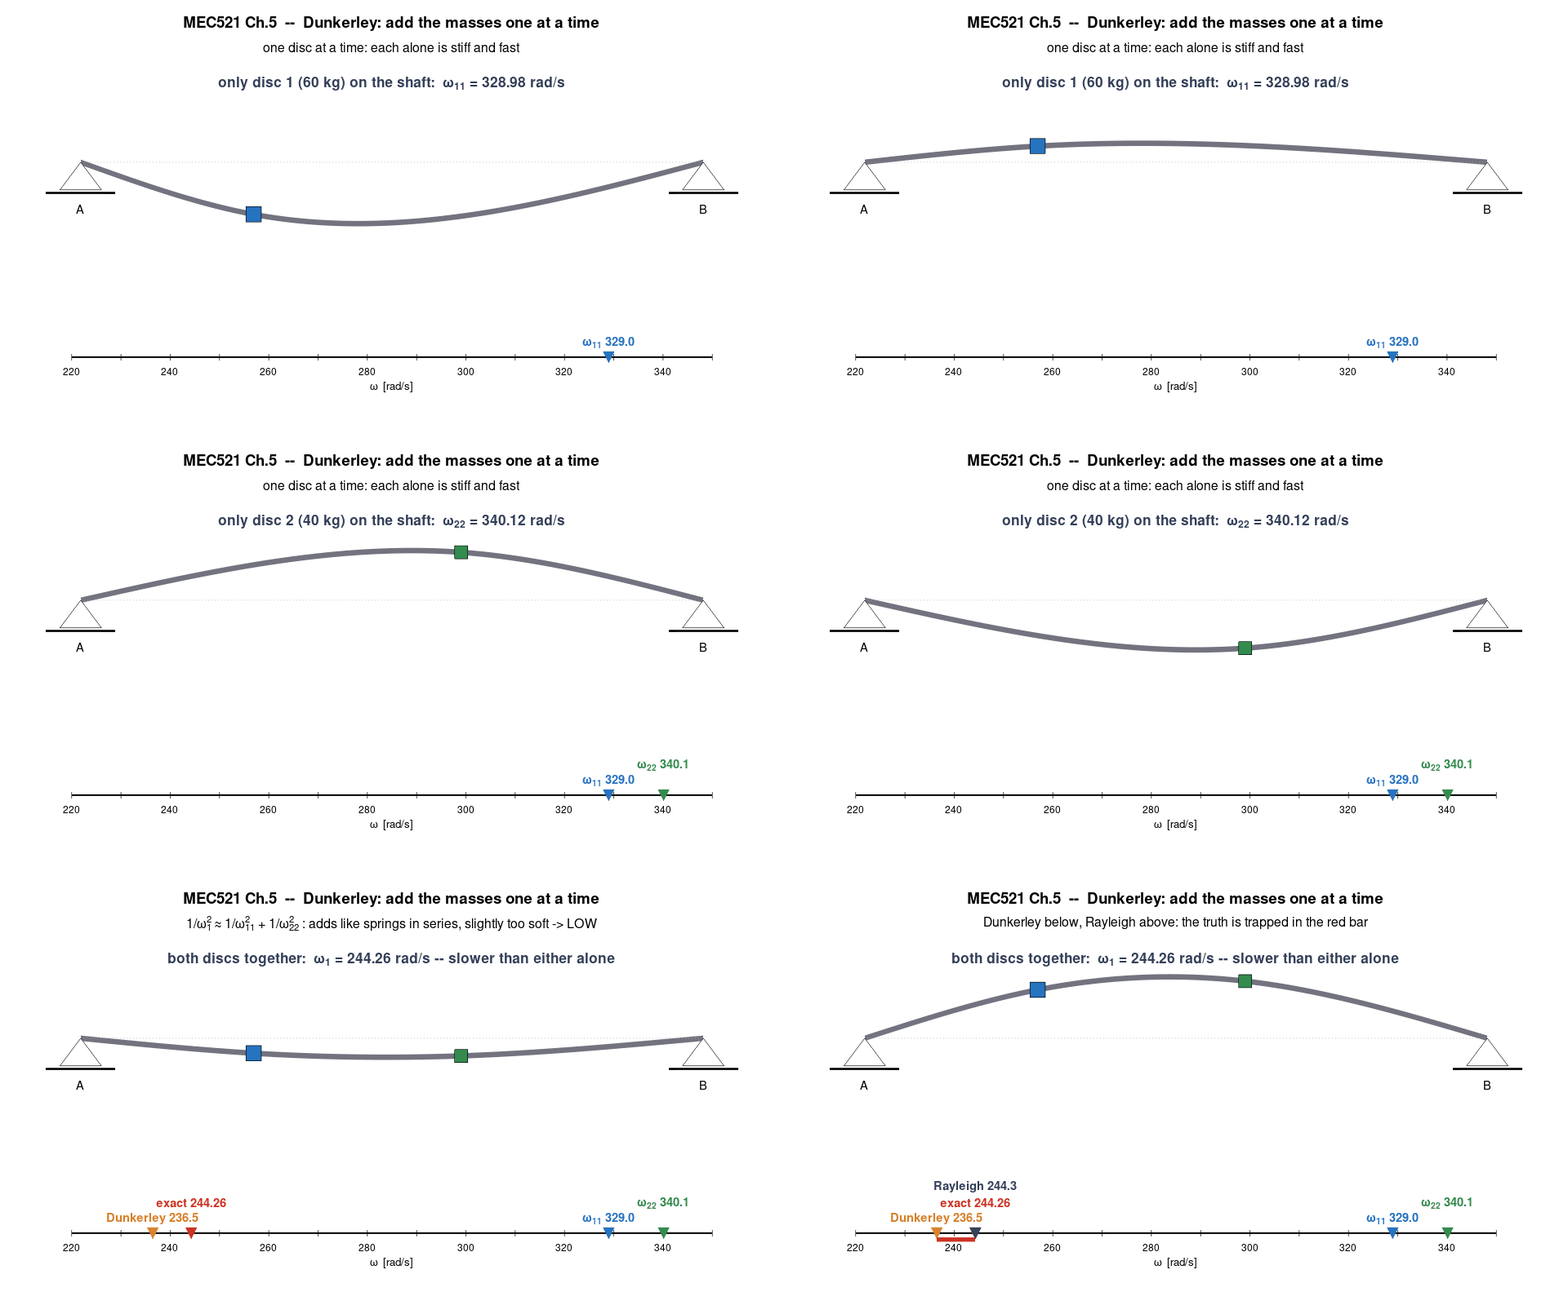
Dunkerley always comes out low and Rayleigh high, so together they bracket the exact ω1 (F5.2.2, F5.3.2). The figure shows how far each misses as the shaft carries more discs; the animation adds the discs one at a time.
Which formula?
Read the situation first, then pick the formula. The tags are the ones on the examination formula sheet and in Appendix A.
A shaft on bearings carrying discs or pulleys
 F5.1.4
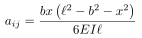
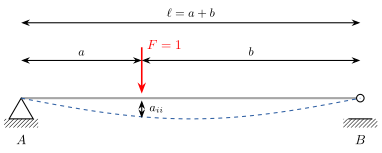
a and b are the distances from the load to each bearing, and a+b=ℓ. Measuring b from the wrong reference is the commonest error in this material, and the answer still looks plausible.
 F5.1.5
Off-diagonal terms. F5.1.4 is the special case x=a.
A quick estimate of the fundamental
 F5.2.1
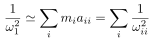
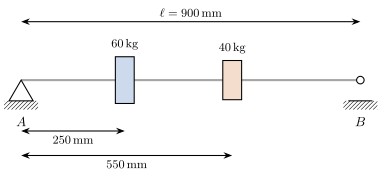
Fast estimate of the fundamental. Needs only the diagonal terms, so it is the cheapest useful answer in the whole course.
A better estimate, if a shape is available
 F5.3.1
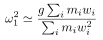
Better than Dunkerley when a sensible trial shape is available. The static shape is usually excellent because it is close to the true mode.
Which side of the true answer am I on?
 F5.2.2
Always a lower bound. So it is conservative for a critical-speed check: if Dunkerley says the shaft is safe with margin, it is.
 F5.3.2
Always an upper bound, and exact only if the trial shape is the true mode. Together with F5.2.2 it brackets the answer: ωDunk≤ω1≤ωRayl.
Reading the pictures
Ways to lose marks
- The wrong bearing. a and b run from the load to each bearing. Measuring both from one end is the commonest error (F5.1.4).
- Dunkerley is a lower bound. It discards the coupling, so the shaft looks more flexible and ω1 comes out low (F5.2.2): the safe side for a critical-speed check.
- Rayleigh is an upper bound. Any trial shape but the true mode stiffens the system, so the estimate is high (F5.3.2). The static deflection shape is usually close.
- Squares. The formulas give 1/ω12 or ω12. Take the root before converting to Hz or rev/min.
- An asymmetric [a]. aij=aji always (F5.1.2); an asymmetric flexibility matrix is an arithmetic error.
Handbook: § 5.1–§ 5.4 for the worked examples, Appendix A for every tag. Slides: the Chapter 5 deck, with every animation. Download the one-page PDF to print.